
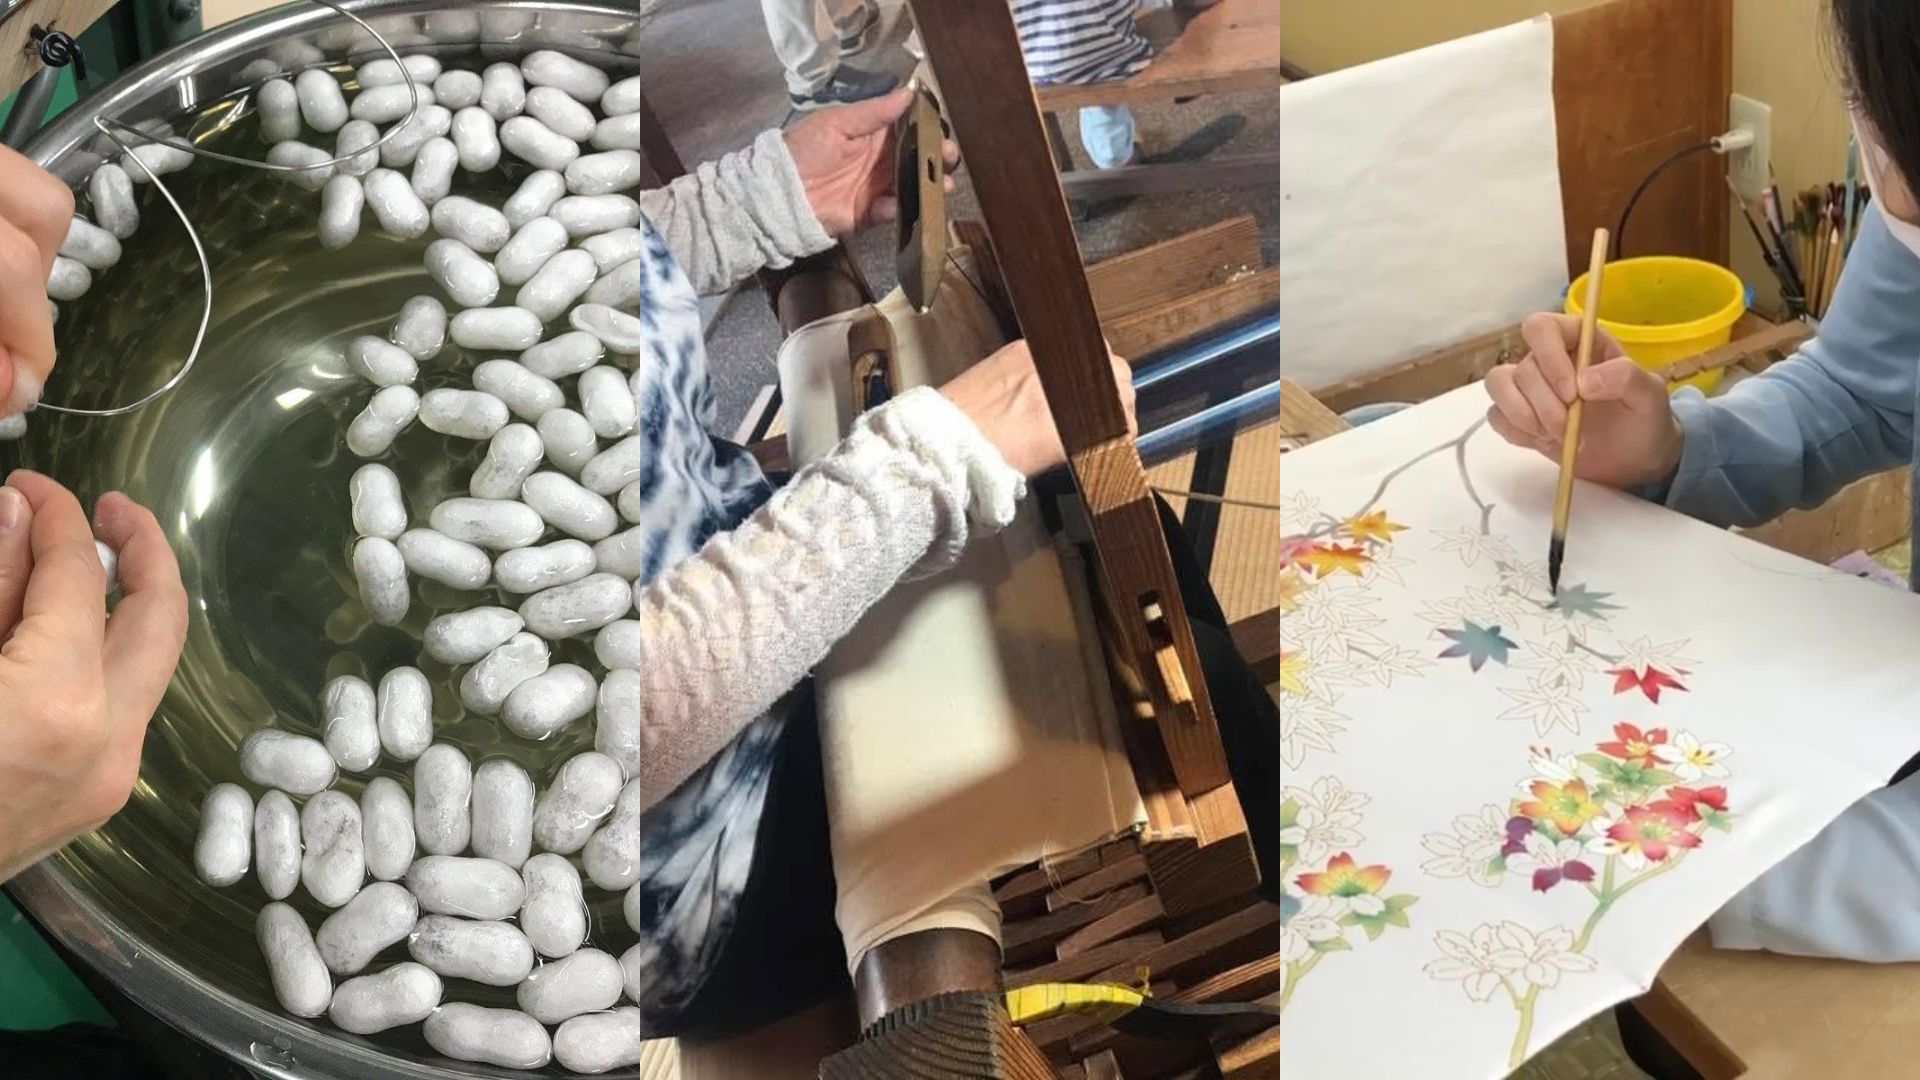
The more I learned about kimono, the more curious I became about how they were made.
Where does the silk come from? How are those beautiful patterns created? And how does a simple bolt of fabric become a kimono?
In this article, I would like to take you on a journey through the making of a silk kimono, from the silkworm to the finished garment, sharing some of my own experiences and visits to kimono workshops along the way.
In This Article
・The Silkworm: Where Silk Begins
— Okaiko-sama: Japan’s Special Relationship with Silkworms
— How Does a Silkworm Make a Cocoon?
・From Cocoon to Silk Thread
— Preparing the Cocoons
— Turning Cocoons into Silk Thread
— How Many Silkworms Does It Take to Make a Kimono?
・From Silk Thread to Fabric
— Types of Silk Kimono Fabrics
— What Is a Tanmono? A Bolt of Kimono Fabric
・How Do Kimono Get Their Colors and Patterns?
— Sakizome: Yarn Dyeing and Kasuri (Japanese Ikat)
— Atozome: Fabric Dyeing and the Art of Yuzen
— Designing a Kimono Before Final Tailoring
— Shibori: Creating Patterns Through Resist Dyeing
— Beyond Dyeing: Embroidery and Other Decoration
・From a Bolt of Fabric to a Kimono
— Kimono Construction: Eight Pieces of Fabric
— The Art of Pattern Placement
・The Many Hands Behind a Kimono
— The People Behind Each Step
— Shokunin-katagi: The Spirit of Japanese Artisans
・A Kimono Is More Than the Fabric We See
The Silkworm: Where Silk Begins
The story of silk begins with the silkworm, known in Japanese as kaiko (蚕).
Despite its name, a silkworm is not actually a worm. It is the caterpillar of the silk moth Bombyx mori, which has been domesticated for silk production over thousands of years.
Silkworms hatch from tiny eggs and spend the next several weeks feeding on mulberry leaves. During this period, they shed their skin four times, and in just 25 days or so, their body weight can increase to around 10,000 times what it was when they hatched.
And they really do eat!
When I raised silkworms with my parents, we even planted our own mulberry field to make sure we had enough leaves to feed them.

One of the things that surprised me most was the sound they made while eating mulberry leaves — a gentle, rhythmic crunching, almost like the sound of falling rain.
In Japanese, there is even a beautiful word for this sound: koshigure (蚕時雨).
I usually dislike insects, but watching these little creatures munch away on their leaves and listening to that gentle sound, I began to find them rather adorable.

Okaiko-sama: Japan’s Special Relationship with Silkworms
Before we continue our journey from silkworm to kimono, I would like to take a little detour into Japanese culture.
In Japanese, different counting words are used depending on what is being counted.
Small animals and insects are generally counted using hiki (匹), while larger animals, such as cattle and horses, are counted using tō (頭).
Interestingly, despite their tiny size, silkworms are also traditionally counted using tō.
For centuries, they were raised as livestock in Japanese farming households.
In many silk-producing regions of Japan, silkworms were respectfully called okaiko-sama (お蚕様), using the same honorific -sama that samurai used to address their lords.
I still affectionately call them okaiko-sama myself.😊
For farming families, silkworms were an important source of income. They were cared for day and night, and families sometimes even gave up part of their own living space to accommodate them.
Their special place in Japanese culture can also be seen in mythology.
In the Kojiki, Japan’s oldest surviving chronicle, compiled in 712, silkworms are said to have emerged from the head of a goddess of food, while rice, wheat, and other crops emerged from other parts of her body.
During the Meiji period (1868–1912), raw silk became one of Japan’s most important exports, contributing greatly to the country’s modernization.
These little creatures helped support not only farming families but an entire nation.
And even today, the tradition of raising silkworms continues in a rather unexpected place: the Imperial Palace.
Empress Shōken began raising silkworms in 1871 to encourage Japan’s silk industry. The tradition has been passed down through successive empresses and continues today with Empress Masako.
One particularly interesting story concerns Koishimaru (小石丸), an old Japanese silkworm variety.
Although it had largely fallen out of commercial use because of its low productivity, Empress Michiko chose to continue raising it.
Its delicate silk later proved invaluable in reproducing eighth-century textiles preserved in the Shōsōin Repository in Nara.
What might once have seemed inefficient turned out to be irreplaceable.
When I first learned about this story, I immediately wanted to raise Koishimaru silkworms myself!
Koishimaru stands in contrast to modern silkworm varieties bred for higher productivity. Although it is more difficult to raise and produces less silk, the silk it yields is remarkably fine, strong, and lustrous.
I felt there was something important in that contrast.
That interest was part of what led me to visit silk research institutes run by the Dainippon Silk Foundation in 2017.
During one visit, I watched Koishimaru silk being reeled from the cocoons. On another, I had the chance to speak with someone involved in imperial sericulture and was shown Koishimaru eggs.


How Does a Silkworm Make a Cocoon?
When a silkworm is fully grown, it stops eating and begins to spin a cocoon around itself.
Moving its head repeatedly, it releases a fine silk filament through a small opening near its mouth.
This filament consists mainly of two proteins: fibroin, which forms the silk fiber itself, and sericin, which acts like a natural glue, holding the fibers together.
Over two to three days, the silkworm gradually surrounds itself with silk, creating a protective cocoon.

And here is something remarkable: a single cocoon can contain around 1,300 to 1,500 meters of silk filament, although the length varies depending on the variety and growing conditions.
Imagine more than a kilometer of silk coming from a creature small enough to rest in the palm of your hand.
Inside the cocoon, the caterpillar transforms into a pupa and eventually emerges as an adult silk moth.
But when the cocoon is destined to become silk thread, its journey usually takes a different path.
From Cocoon to Silk Thread
How do we turn that delicate little cocoon into silk thread?
Preparing the Cocoons
Once the cocoons have formed, they are collected and sorted.
In conventional production of reeled silk, the pupae inside the cocoons are usually killed by heat before the moths emerge.
Why?
When a moth emerges, it breaks through the cocoon, interrupting the long silk filament.
By preventing the moth from emerging, producers can preserve the continuous filament needed to make reeled silk.
Cocoons from which moths have already emerged can also be used to produce silk, although their shorter fibers generally need to be processed differently.
Turning Cocoons into Silk Thread
The cocoons are heated in water to soften the sericin that holds the silk filament in place.
Once the end of the filament has been found, the silk can be unwound from the cocoon.
However, a single filament is extremely fine. Several filaments from different cocoons are therefore brought together to form one strand of raw silk.
This process is called reeling.


Reeling is not the only way to produce silk thread. Cocoons can also be softened and stretched into layers of silk floss, known in Japanese as mawata (真綿), from which yarn can be drawn by hand.
This traditional method is used to produce certain silk textiles, such as Yuki Tsumugi (結城紬).
In 2017, I had the opportunity to watch a demonstration of this traditional technique and feel the hand-drawn silk yarn for myself at Tourism EXPO Japan in Tokyo.

For reeled silk, another important process is degumming, in which the sericin is removed. Depending on the type of fabric, this takes place either before or after weaving.
The way silk is prepared helps determine the texture, softness, and sheen of the finished fabric.
How Many Silkworms Does It Take to Make a Kimono?
As we saw earlier, a single silkworm can produce more than a kilometer of silk filament.
But how many silkworms are needed to make enough fabric for one kimono?
To produce enough silk for the outer fabric of a typical adult kimono, approximately 3,000 cocoons are needed, yielding around 900 grams of raw silk and 675 grams of silk after degumming.
The exact number varies depending on the silkworm variety, the type and weight of the fabric, and the manufacturing process. A lined kimono also requires additional material.
In 2017, I had the opportunity to see approximately 3,000 silkworms gathered in one place.
Seeing them all together made me realize just how many little creatures are involved in the creation of a single garment.

Thousands of tiny cocoons — and we have not even begun to weave the fabric yet.
From Silk Thread to Fabric
Once silk thread has been produced, the next step is to transform it into fabric.
Before weaving can begin, the threads are prepared according to the type of fabric being made. Some are twisted to achieve particular textures or strengths, while others are used with little or no twist.
The threads running lengthwise on a loom are called the warp, while those passing across them are called the weft.
By interlacing these threads, cloth is created.
The basic principle sounds simple, yet the way these threads are prepared and woven together can produce remarkably different fabrics.

Types of Silk Kimono Fabrics
One of the things I particularly love about kimono fabrics is the way patterns can emerge in the light.
A beautiful example is rinzu (綸子), a type of silk damask in which patterns are created through the weave itself.
As different parts of the fabric reflect light differently, the patterns seem to appear and disappear depending on the angle from which you look at them.
In an iromuji, a kimono dyed in a single color, these woven patterns alone can give the garment a rich and elegant expression.

What I find even more fascinating is that these woven patterns can also be found beneath colorful designs created through dyeing and painting — techniques we will explore in the next section — adding another layer of beauty.

Of course, creating patterns is only one of the many possibilities of silk weaving.
Habutae (羽二重) is known for its smooth surface and delicate sheen.
Chirimen (縮緬), a type of silk crepe, has a distinctive textured surface. In traditional Tango Chirimen, the weft threads are twisted around 3,000 to 4,000 times per meter. After weaving, the fabric is degummed, causing the tightly twisted threads to contract and partially untwist, creating its characteristic texture, known as shibo (シボ).

Tsumugi (紬) can have a more understated, natural texture, while ro (絽) and sha (紗) use open weaving structures to create a delicate transparency.

Smooth or textured, glossy or understated, substantial or almost transparent — all these fabrics can be made from the same natural fiber.
Even without elaborate colors or decoration, the weave itself can give the fabric a distinctive character.
What Is a Tanmono? A Bolt of Kimono Fabric
Traditional kimono fabric is produced as a long, narrow bolt known as a tanmono (反物).
A typical tanmono for an adult kimono measures around 37 centimeters wide and 13 meters long, although dimensions vary.
A single tanmono generally provides enough fabric for the entire outer layer of a kimono.
This narrow format is particularly well suited to the traditional construction of kimono, as we will see later.

How Do Kimono Get Their Colors and Patterns?
A beautiful kimono pattern may look like a painting, a woven picture, or a collection of tiny geometric shapes.
Yet even similar designs can be created in very different ways. A simple striped pattern, for example, can be woven using colored threads or dyed onto the finished fabric.
In Japanese, these two approaches are known as sakizome and atozome.
Sakizome: Yarn Dyeing and Kasuri (Japanese Ikat)
Sakizome (先染め) means that the threads are dyed before the fabric is woven.
By carefully arranging threads of different colors, the weaver can create stripes, checks, geometric patterns, and even remarkably intricate designs.
Kasuri (絣) is a Japanese resist-dyeing technique related to what is internationally known as ikat.
In kasuri, selected sections of the threads are protected from the dye before weaving. When these threads are woven together, their dyed and undyed areas form a pattern.
In Yuki Tsumugi, for example, the pattern is carefully planned on graph paper. Selected sections of the silk threads are then tightly bound by hand with cotton thread to prevent the dye from penetrating those areas.

A different approach is used in Oshima Tsumugi (大島紬), a traditional silk textile particularly associated with the Amami Islands.
To create its intricate kasuri patterns, bundles of silk threads are tightly woven with cotton threads using a special loom called a shimebata (締機).
The cotton protects selected areas of the silk from the dye. Once dyeing is complete, the cotton is removed, and the silk threads are ready to be woven into the actual fabric.
During weaving, the artisan carefully adjusts the position of the threads so that the tiny elements of the pattern align correctly.
In other words, the design must already exist in the threads before the fabric itself is made.
I find it remarkable that such intricate patterns can emerge from what initially appear to be little more than a collection of partially dyed threads.

Atozome: Fabric Dyeing and the Art of Yuzen
Atozome (後染め), by contrast, refers to dyeing fabric after it has been woven.
One of the best-known examples is Yuzen (友禅), a dyeing technique that allows artisans to create beautiful floral motifs, landscapes, and highly detailed pictorial designs on silk.
In traditional hand-painted Yuzen, the outlines of the design are traced with a fine line of resist paste called itome-nori (糸目糊). This prevents the dyes from spreading into neighboring areas.
Colors are then carefully applied with brushes, creating delicate gradations and subtle variations in shading.

Further processes, such as steaming to fix the dyes and washing away the resist paste, are needed before the fabric is ready for its final finishing.
In 2021, I had the opportunity to visit Kanamaru Senko, a Kaga Yuzen workshop in Kanazawa, where I watched artisans at work and even tried my hand at dyeing a maple leaf.

It looked so easy when the artisan was doing it.
But when I tried it myself, I realized how much thought went into every brushstroke.
I had applied red to three parts of the leaf, unintentionally making the middle lighter than the two sides. The artisan explained that making the middle darker and the two sides lighter would give the design a more defined appearance.
I was so focused on moving the brush that I hadn’t even considered such details!
At least the artisan complimented me on moving my brush without hesitation. 😁

That experience made me appreciate the subtle decisions and delicate adjustments behind what appeared to be such effortless movements.
Of course, not all Yuzen is hand-painted.
Another traditional method, known as kata-Yuzen (型友禅), uses stencils to apply colors and create patterns. An elaborate design may require dozens or even hundreds of individual stencils.
Designing a Kimono Before Final Tailoring
Another aspect of kimono dyeing that I find fascinating is how artisans must envision the finished garment long before the final tailoring begins.
On kimono such as homongi and furisode, patterns often extend across the seams, connecting the sleeves and body into a single composition.
To achieve this effect, the white fabric may first be temporarily sewn into the shape of a kimono, a process known as kari-eba (仮絵羽).
The design is planned across the different sections, which are then separated for dyeing before being sewn together again.
Imagine planning a painting that must fit perfectly across several pieces of fabric, knowing that those pieces will eventually become a three-dimensional garment.

Shibori: Creating Patterns Through Resist Dyeing
Another beautiful example of atozome is shibori (絞り).
Like kasuri, shibori uses the principle of preventing dye from reaching certain areas. The difference is that the resist is applied to the fabric rather than to the individual threads before weaving.
Sections of the fabric may be tied, stitched, folded, or compressed before dyeing.
Once the fabric is released from its bindings or restraints, the patterns are revealed.
Some shibori techniques also leave a delicate three-dimensional texture on the surface of the fabric.
When you look closely at a traditional hand-tied kanoko shibori kimono, it is astonishing to think that each of those tiny patterns was created by individually binding a small section of fabric.

Shibori Haori from Our Collection
This technique lives on in many of the vintage haori still with us today. Here are a few one-of-a-kind shibori haori from our collection, all made in Japan.


Beyond Dyeing: Embroidery and Other Decoration
The possibilities do not end with dyeing.
Embroidery can add depth and texture to a design, while gold and silver decoration can introduce a different kind of brilliance.
A single kimono may combine several of the techniques we have explored: woven patterns in the silk itself, beautifully dyed motifs, delicate embroidery, and touches of gold.
Each adds another dimension to the finished design.

Of course, not every kimono is made using elaborate traditional techniques. Machine weaving, modern printing, and industrial dyeing are also part of kimono production.
There is no single process that applies to every kimono.
From a Bolt of Fabric to a Kimono
Once the fabric is ready, the kimono can finally be tailored for its wearer.
This stage is known as shitate (仕立て), or tailoring. The traditional Japanese art of kimono tailoring is called wasai (和裁).
Depending on the type of kimono, the fabric may still be in the form of an uncut bolt or may already have been cut into sections in preparation for dyeing.
Before the final sewing begins, the tailor checks the fabric, takes the wearer’s measurements, and carefully considers the placement of the patterns.
Kimono Construction: Eight Pieces of Fabric
Unlike Western dressmaking, which often involves cutting fabric into curved shapes, traditional kimono construction relies largely on straight lines and rectangular pieces.
The outer fabric of a typical kimono is cut into eight pieces:
- Two body panels (migoro)
- Two sleeves (sode)
- Two front overlap panels (okumi)
- One main collar (eri)
- One outer collar strip (kake-eri)
Interestingly, each body panel runs continuously from the front to the back, folding at the shoulder. This means that a traditional kimono has no shoulder seams.

Traditionally, kimono are sewn entirely by hand. Today, some tailoring methods combine hand sewing with machine stitching, even for silk kimono.
Depending on whether the kimono is lined (awase) or unlined (hitoe), the tailoring process and the amount of fabric required will differ.
Another interesting feature of traditional kimono tailoring is that excess fabric is often folded into the seams rather than cut away, allowing the garment’s dimensions to be adjusted later if necessary.
The construction may look simple, but it requires considerable precision and skill.
The Art of Pattern Placement
Tailoring a kimono is not simply a matter of cutting and sewing.
The placement of colors and patterns can also have a remarkable effect on the appearance of the finished garment.
At a kimono exhibition I once visited in Japan, I came across a fascinating display of three kimono made from the same fabric design.

Look at how differently the white and colored areas are arranged on each kimono.
I find this particularly fascinating. The beauty of a finished kimono depends not only on the design of the fabric itself, but also on how the tailor chooses to work with it.
For kimono with designs that flow across the seams, such as those we explored in the section on kari-eba, even a small difference in the placement of the fabric can affect the overall composition.
Tailoring requires not only technical skill but also an eye for beauty and balance.
And finally, after all these stages, the silk produced by thousands of tiny silkworms has become a beautiful kimono.
The Many Hands Behind a Kimono
Throughout this article, we have explored the materials and techniques involved in making a silk kimono.
But behind all these techniques are people.
The People Behind Each Step
There are the farmers who raise silkworms, the people who turn cocoons into silk thread, the weavers who create beautiful fabrics, the dyers who bring colors and patterns to life, the artisans who add embroidery and other decorations, and the tailors who give the fabric its final shape.
Even within a single stage of production, several specialists may be involved.
The delicate sheen of silk, the intricate woven patterns, the subtle gradations of color, and the carefully matched patterns across the seams are all the results of their work.
What we see as a single kimono is the result of many different skills coming together.
Shokunin-katagi: The Spirit of Japanese Artisans
Through my visits to kimono workshops, I have come to appreciate not only the technical skills of the artisans, but also the thought and care they put into their work.
Mastering a technique is one thing. Continuing to give thought and care to every movement, even after years of practice, is something else.
In Japan, we have an expression, shokunin-katagi (職人気質), which describes the characteristic spirit of artisans — their dedication, integrity, pride in their work, and sometimes a certain stubbornness.
I have always had a particular fondness for artisans.
Some can be a little difficult to get to know, but in my experience, they are remarkably honest and sincere. They keep their promises, and once you earn their trust, they can be incredibly generous with their knowledge and support.
Many of the kimono artisans I have met rarely talk about how extraordinary their skills are.
Perhaps that is one of the reasons why I enjoy talking about their craftsmanship so much whenever I have the opportunity. 😊

A pattern that appears effortless may represent years of learning and practice.
A woven fabric may carry knowledge passed from one generation of craftspeople to another.
And a garment that takes only a few moments to admire may be the result of a very long journey.
A Kimono Is More Than the Fabric We See
In Japan, we say itadakimasu (いただきます) before eating.
The word literally means “I humbly receive.” It is an expression of gratitude for the food, the lives that sustain us, and the efforts of those who have made the meal possible.
For me, this way of thinking extends beyond food.
A single silk kimono is made possible by the lives of thousands of silkworms.
It also carries a part of the lives of the people who made it — their knowledge, skills, care, and time.
After all, the time someone devotes to making something is a part of their own life.
When I look at a silk kimono, I feel grateful for all that has gone into its creation.
I believe that cherishing the things we receive is also a way of showing respect for the people and the natural world behind them.
But cherishing a kimono does not mean simply keeping it safely stored away. It means wearing it, enjoying it, and making the most of its beauty.
Perhaps the same can be said of life itself.
Thinking about the lives and time that go into the things I receive inspires me not only to cherish them, but also to live my own life a little more fully and a little more beautifully.
The more I learn about how kimono are made, the more I find to appreciate and love about them.
And perhaps the next time you see a beautiful silk kimono, you will see something more than its colors and patterns.
To me, that makes its beauty even more remarkable.

Sources
- Gunma Prefecture. “The Silk Industry”. [Japanese] This resource explains the life cycle of silkworms, their growth, cocoon formation, and the length of silk filament produced by a single silkworm.
- Suwako Club. “Learning About Silkworms and the Silk Industry That Supported Japan’s Modernization”. January 2025. [Japanese] This educational publication explores sericulture, silk production, and the history of Japan’s silk industry. Page 21 provides estimates of the number of cocoons and the quantity of silk required to make a kimono.
- Minokamo City Museum. “Okaiko-sama”. [Japanese] This museum resource explains the respectful name given to silkworms and their importance to Japanese farming households.
- Kokugakuin University. “The Origins of the Five Grains in the Kojiki”. This academic resource presents the Japanese myth in which silkworms and agricultural crops emerge from the body of a food goddess.
- Maison de la culture du Japon à Paris. “Kaiko: Imperial Sericulture, Ancient Textiles, and Silk Exchanges Between Japan and France”. [Japanese] This exhibition resource explores imperial sericulture, the preservation of the Koishimaru silkworm variety, and the reproduction of ancient Shōsōin textiles.
- Lee, Yong-woo. “Silk Reeling and Testing Manual”. Food and Agriculture Organization of the United Nations (FAO), 1999. This technical publication explains silk composition, cocoon preparation, reeling, and silk floss production.
- UNESCO. “Yuki-tsumugi, Silk Fabric Production Technique”. This resource documents the traditional techniques of Yuki Tsumugi, including hand-spinning silk floss, resist-dyeing, and weaving.
- Tango Textile Industrial Association. “The Production Process of Tango Chirimen”. [Japanese] This resource explains how high-twist silk threads, weaving, and degumming create the characteristic texture of chirimen.
- Honba Oshima Tsumugi Textile Cooperative Association. “The Production Process of Oshima Tsumugi”. [Japanese] This resource illustrates the preparation of resist-dyed silk threads and the intricate weaving of kasuri patterns.
- Kyo-Yuzen Promotion Council. “Traditional Kyo-Yuzen Techniques”. [Japanese] This resource introduces hand-painted and stencil-dyed Yuzen, gold decoration, and modern printing techniques.
- The Kyoto Museum of Traditional Crafts, FUREAIKAN. “The Ancient History, Making and Wearing of a Kimono”. Google Arts & Culture. This resource introduces kimono construction, traditional textile techniques, and the eight-piece structure of a kimono.
- Ministry of Agriculture, Forestry and Fisheries of Japan. “The Meaning Behind Itadakimasu and Gochisousama”. [Japanese] This article explores the Japanese tradition of expressing gratitude for food, nature, and the people involved in preparing our meals.

Leave a Reply